Creamy Cannoli Tart with Ricotta Filling

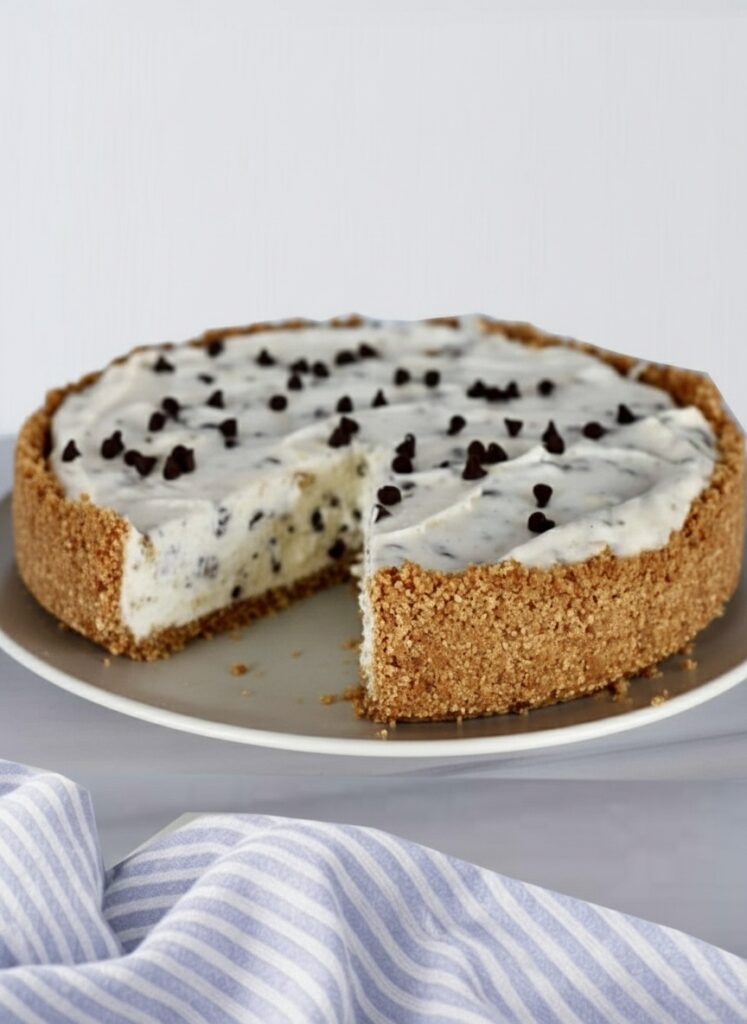
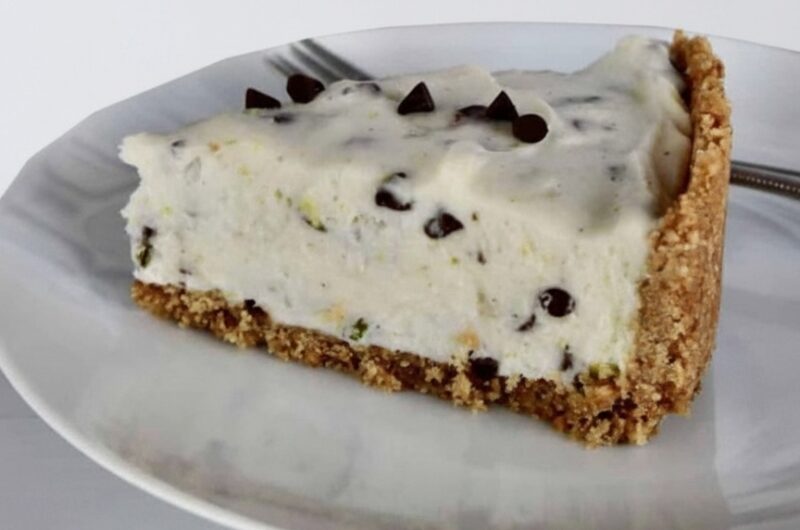
Cannoli Tart is a delicious twist on the classic Italian cannoli dessert that combines the rich, creamy filling of cannoli with a buttery, crisp tart crust. Instead of making individual cannoli shells, which can be tricky, you make a single tart crust that holds all the creamy, sweet ricotta filling in one large dessert. It’s a great way to enjoy the taste of cannoli without spending hours frying shells.
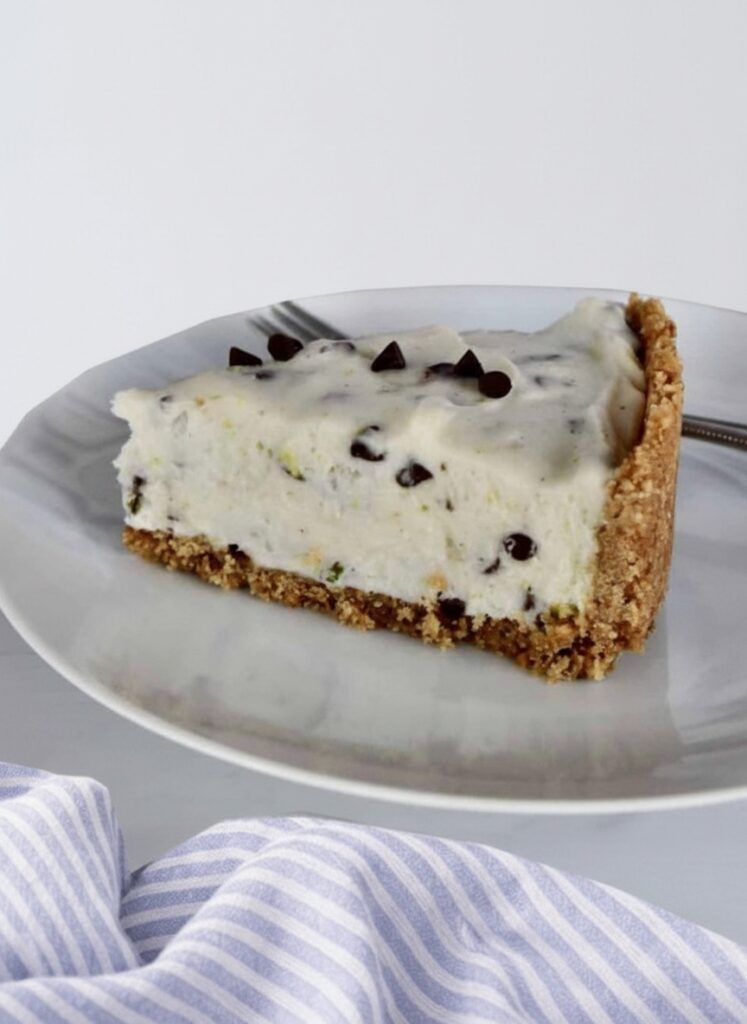
This dessert is perfect for holidays, birthdays, or just when you want to impress your family with something that looks fancy but is secretly simple to make. Kids and adults both love the smooth, sweet filling paired with the crunchy crust and optional chocolate chips or pistachio topping.
You Should Try the Cannoli Tart
If you love creamy desserts, you should absolutely try this Cannoli Tart. It saves time compared to making regular cannoli, and you don’t have to worry about any deep frying. You simply bake a tart crust, mix a creamy ricotta filling, and chill it. The result is a stunning dessert that can be served in neat slices.
Another great thing about this tart is that you can make it ahead of time, which makes it perfect for parties or family dinners. Kids can even help mix the filling or sprinkle chocolate chips on top, making it a fun family activity.
Table of Contents
Ingredients for Cannoli Tart
Here’s everything you’ll need to make this Cannoli Tart
For the crust:
- 1 ½ cups graham cracker crumbs or crushed digestive biscuits
- 6 tbsp melted butter
- 2 tbsp sugar
For the filling:
- 2 cups ricotta cheese well drained
- 1 cup mascarpone cheese or cream cheese as a substitute
- ¾ cup powdered sugar
- 1 tsp vanilla extract
- ½ tsp cinnamon
- ½ cup mini chocolate chips
- Chopped pistachios optional, for topping
How to Make Cannoli Tart
Step One
The first thing you need to do is prepare the crust: Preheat the oven to 175°C. In a bowl, mix the graham cracker crumbs, melted butter, and sugar until combined. Press this mixture evenly into the bottom and sides of the tart pan using the back of a spoon or mug. Bake for 10 minutes until light golden brown, then let it cool completely.
Step Two
Now, prepare the filling: In a large bowl, use a hand mixer to mix the ricotta cheese, mascarpone, powdered sugar, vanilla, and cinnamon until smooth and creamy. Add the mini chocolate chips and gently fold in with a flat spoon.
Step Three
Then, assemble the tart: Pour the filling into the chilled crust and spread it evenly with a flat spoon. Sprinkle with additional chocolate chips or chopped pistachios, if desired.
Step Four
Finally, chill the tart: Refrigerate for at least 2-3 hours to set before cutting. Then, serve: Cut with a sharp knife and serve chilled.
Kitchen Equipment Needed :
Before you start cooking, make sure you have the following equipment ready:
- Mixing bowls medium and large
- Hand mixer or whisk
- Rubber spatula
- Measuring cups and spoons
- 9-inch tart pan
- Spoon or flat-bottomed glass for pressing crust
- Fine strainer or cheesecloth for draining ricotta
- Refrigerator space for chilling
Tips for Making Perfect Pina Colada Cupcakes
Drain ricotta well: Wrap ricotta in cheesecloth and press out extra liquid. This keeps the filling thick and creamy instead of watery.
Use high-quality chocolate chips: They melt nicely in your mouth and make the dessert taste richer.
Don’t skip chilling: This step helps the filling firm up so your slices hold their shape.
Crust options: Try chocolate cookie crumbs for a deeper flavor.
Serving Suggestion
Honestly, I like to serve this tart with light drinks to balance the flavors, such as lemonade or a smoothie. When I serve it for breakfast, I serve it with hot espresso, a milkshake, or a cup of milk for the children.
Frequently Asked Question
Do I have to bake the crust ?
Yes, baking the crust for about 10 minutes helps it set and keeps it from crumbling when you slice the tart.
Can I make this tart without mascarpone ?
Yes, cream cheese is a great substitute. It will give a slightly tangier flavor but still tastes delicious.
Can I make this tart sugar-free ?
Yes, use a sugar substitute like powdered erythritol in the filling and sugar-free cookies for the crust.
Can I freeze Cannoli Tart ?
Yes. Wrap slices individually in plastic wrap and store in a freezer-safe container for up to a month. Thaw overnight in the refrigerator before serving.
Cannoli Tart
Course: DessertCuisine: Italian, AmericanDifficulty: Easy8
servings15
minutes10
minutes320
kcal2
hours25
minutesThis Cannoli Tart is a creamy, crunchy twist on the classic Italian cannoli. It features a buttery graham cracker crust, smooth ricotta-mascarpone filling, and sweet chocolate chip topping perfect for an easy but impressive dessert.
Ingredients
1 ½ cups graham cracker crumbs or crushed digestive biscuits
6 tbsp melted butter
2 tbsp sugar
2 cups ricotta cheese well drained
1 cup mascarpone cheese or cream cheese as a substitute
¾ cup powdered sugar
1 tsp vanilla extract
½ tsp cinnamon
½ cup mini chocolate chips
Chopped pistachios optional, for topping
Directions
- The first thing you need to do is prepare the crust: Preheat the oven to 175°C. In a bowl, mix the graham cracker crumbs, melted butter, and sugar until combined. Press this mixture evenly into the bottom and sides of the tart pan using the back of a spoon or mug. Bake for 10 minutes until light golden brown, then let it cool completely.
- Now, prepare the filling: In a large bowl, use a hand mixer to mix the ricotta cheese, mascarpone, powdered sugar, vanilla, and cinnamon until smooth and creamy. Add the mini chocolate chips and gently fold in with a flat spoon.
- Then, assemble the tart: Pour the filling into the chilled crust and spread it evenly with a flat spoon. Sprinkle with additional chocolate chips or chopped pistachios, if desired.
- Finally, chill the tart: Refrigerate for at least 2-3 hours to set before cutting. Then, serve: Cut with a sharp knife and serve chilled.
Notes
- Drain the Ricotta Well: Wrap ricotta in cheesecloth and let it sit for at least 30 minutes to remove extra moisture. This keeps the filling creamy and not watery.
- Toast the Crust: Bake the crust a few minutes longer for an extra crunchy base. Just keep an eye on it so it doesn’t burn.
- Chill the Crust Before Filling: Let the crust cool completely before adding the filling. This keeps the crust crisp.
- Sift the Sugar: Sift powdered sugar before adding it to the filling to avoid lumps and make a smoother cream.
You can add this post to your favorite Pinterest board!